1. Understanding Fabric Stains: Why Some Marks Are So Hard to Remove
Stain removal and fabric damage prevention start with understanding a simple truth: stains are not all the same, and fabrics are not passive surfaces. If you’ve ever treated a stain immediately and still watched it refuse to disappear, you didn’t necessarily make a mistake — you likely misunderstood how stains interact with fabric fibers.
Most people react emotionally when they see a stain. They scrub, add heat, mix products, or rush the garment into the washing machine. Unfortunately, this instinctive response is responsible for a large share of permanent fabric damage. Textile care research consistently shows that improper first treatment is one of the main reasons stains become set and fibers weaken over time.
In practical terms, the first few minutes matter — but only if you act correctly.
Why stains behave differently
A stain is not just “dirt.” It is a substance that bonds with fabric fibers in different ways depending on three critical factors:
- The stain source (oil-based, protein-based, dye-based, or particulate)
- The fabric structure (natural vs. synthetic, tight vs. loose weave)
- Time and temperature exposure (fresh vs. set-in, cold vs. heat)
For example, protein stains such as blood or dairy react aggressively to heat. When hot water is applied too early, proteins coagulate — similar to cooking an egg — locking the stain into the fabric. Oil stains behave differently, spreading when water is added too soon. Dye-based stains chemically bind to fibers and can become permanent after a single incorrect wash.

Fabric is an active participant
Fabric fibers are not neutral. Cotton, wool, silk, polyester, and blends all respond differently to moisture, friction, and chemicals.
- Natural fibers absorb stains more deeply but often respond better to controlled, gentle treatment.
- Synthetic fibers resist absorption but are more vulnerable to heat damage and chemical reactions.
- Delicate fabrics may survive a stain but not aggressive removal.
This is why a method that works on a cotton shirt can permanently damage silk or wool.
The overlooked role of friction
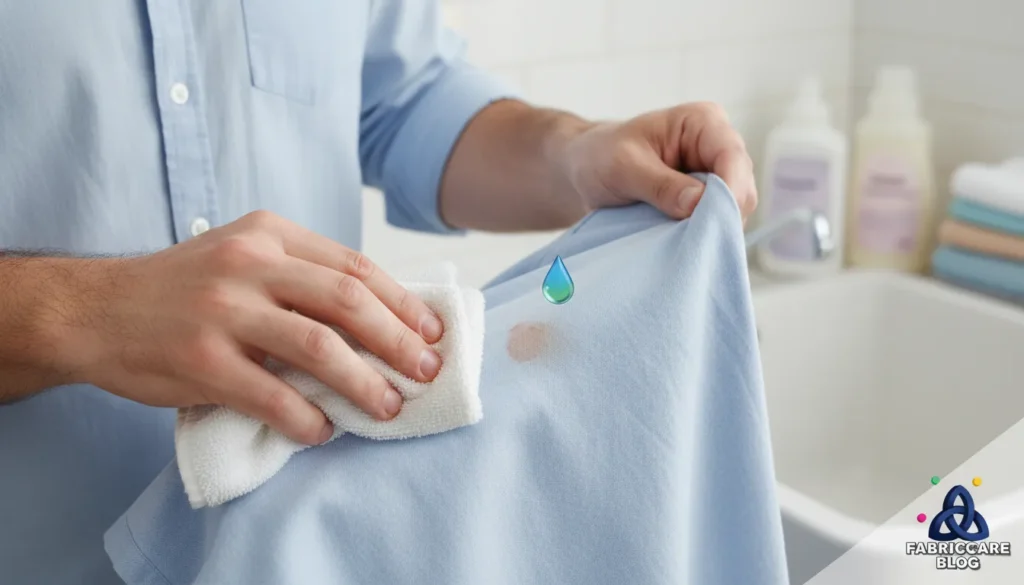
Rubbing feels productive, but friction often forces stains deeper into the fiber structure. Textile abrasion tests show that wet fabrics exposed to aggressive rubbing can lose over 30% of surface fiber strength.
In practice, scrubbing trades stain removal for long-term fabric damage.
Why prevention matters as much as removal
Effective stain removal is inseparable from fabric damage prevention. Repeated harsh treatments weaken fibers, fade colors, and shorten garment lifespan. Research indicates that fabrics exposed to aggressive stain treatment routines can lose up to 40% of their tensile strength over time.
Understanding stains at this foundational level allows you to:
- Choose the right first response
- Avoid treatments that permanently set stains
- Protect fabric structure
- Know when to stop before damage occurs
This is the core principle behind stain removal and fabric damage prevention: not every stain should be fought the same way, and not every stain should be fought at all.
2. How Fabric Type Changes Everything in Stain Removal
Stain removal and fabric damage prevention depend heavily on fabric type — often more than on the stain itself. Treating every fabric the same way is one of the fastest paths to fading, distortion, and irreversible fiber damage.
Most stain-removal failures happen because people focus exclusively on what caused the stain and ignore what the fabric is made of. This mismatch leads to ruined garments even when the stain itself was minor.
Why fabric type matters more than the stain
Every fabric has a unique combination of:
- Fiber structure
- Absorption behavior
- Tolerance to water, heat, and chemicals
These properties determine how deeply a stain penetrates and how safely it can be removed.
To clarify this, consider how common fabric categories behave.
Fabric behavior comparison
Why this table exists:
Different fabrics fail in different ways. This comparison helps you decide how cautious you need to be before applying water, heat, or stain removers.
| Fabric Type | Absorption Level | Heat Sensitivity | Stain Removal Risk |
|---|---|---|---|
| Cotton / Linen | High | Low–Medium | Moderate |
| Wool | High | High | High |
| Silk | Medium | Very High | Very High |
| Polyester | Low | Medium–High | Medium |
| Blends | Variable | Variable | Unpredictable |
How to use this table:
If a fabric ranks high in heat sensitivity or removal risk, your first response should always be gentler and slower, even if the stain appears small.
Natural vs. synthetic fibers
Natural fibers like cotton, linen, wool, and silk absorb stains more quickly. While this sounds negative, it often means stains can be lifted if treated correctly and early. The downside is increased vulnerability to:
- Shrinking
- Warping
- Texture changes
- Color loss
Synthetic fibers, such as polyester and nylon, resist absorption but are highly sensitive to heat and harsh chemicals. Heat can cause glazing, melting, or permanent discoloration.
In practical terms:
Natural fibers forgive method. Synthetic fibers forgive time. Confusing these two causes damage.
Delicate fabrics change the rules completely
Silk, wool, lace, and specialty fabrics don’t simply stain — they react. Water alone can leave marks, friction can distort the weave, and mild detergents can strip protective oils.
Textile care data shows that delicate fabrics exposed to aggressive stain treatment are twice as likely to suffer irreversible damage compared to everyday fabrics.
This means “trying one more time” often makes things worse, not better.
Blended fabrics: the hidden danger
Blended fabrics behave like the most sensitive fiber in the mix. A cotton-poly blend may tolerate water but react badly to heat. A wool blend may shrink even if only part of the fiber is wool.
Rule of thumb:
Always treat blends as more delicate than they appear.
A fabric-first decision filter
Before treating any stain, pause and ask:
- Is this fabric natural, synthetic, or blended?
- How does it react to heat?
- What damage would be worse than the stain itself?
This pause alone prevents many of the most common mistakes in stain removal and fabric damage prevention.
3. Fresh vs. Set-In Stains: What You Should Do First
When it comes to stain removal, timing matters — but timing without strategy is what causes damage. Many people believe that acting immediately is always the best move. In reality, the difference between a fresh stain and a set-in stain changes what you should do first, what you should avoid, and when you should stop.
Understanding this distinction alone can prevent most permanent staining and fabric wear.
What actually makes a stain “set”
A stain becomes set when it has chemically or physically bonded with the fabric fibers. This usually happens because of one (or more) of the following:
- Heat exposure (dryer, hot water, ironing)
- Time (hours or days untreated)
- Improper first treatment (scrubbing, wrong product)
- Repeated washing without full removal
Textile studies show that heat is the single biggest factor in locking stains into fabric. Once heat is applied, many stains — especially protein-based ones — undergo changes that make them extremely difficult or impossible to remove.
In practical terms:
If a stained garment has been through the dryer, you must assume the stain is set and adjust expectations accordingly.
Fresh stains: your advantage window
Fresh stains sit closer to the surface of the fabric. They haven’t fully bonded yet, which gives you an advantage — if you respond correctly.
Your first goal with a fresh stain is not removal.
It’s containment.
That means:
- Blotting, not rubbing
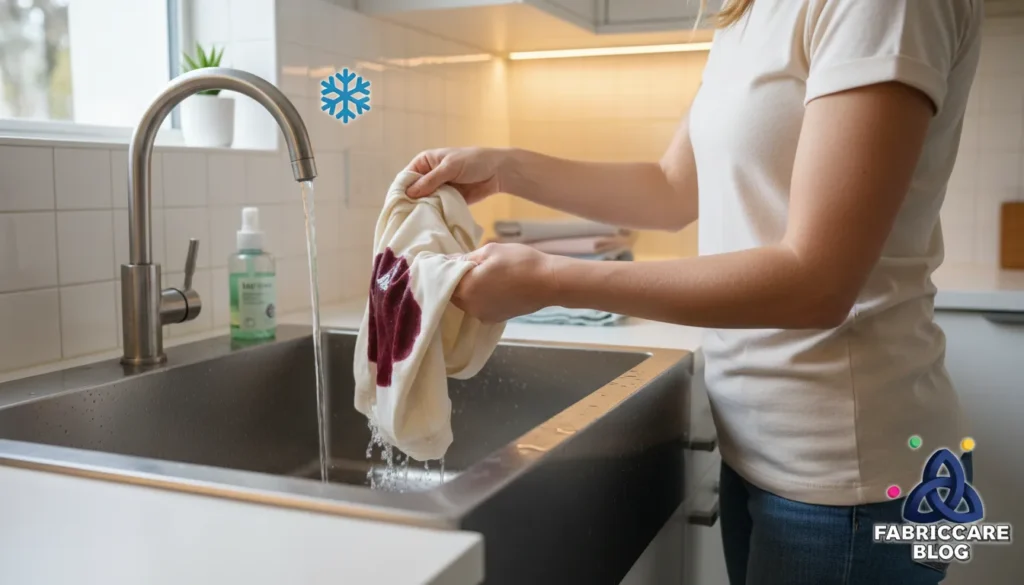
- Using cold or room-temperature water when appropriate
- Avoiding detergents or chemicals until you identify the stain type
Statistics from laundry care testing indicate that garments treated correctly within the first 10 minutes have a removal success rate over 70%, compared to under 40% when mishandled early.
The takeaway: fast is good — reckless is not.
Set-in stains: shift from removal to damage control
Once a stain is set, aggressive action often does more harm than good. At this stage, the goal changes:
- Reduce visibility
- Prevent fiber damage
- Avoid spreading or discoloration
Many fabrics tolerate one or two careful treatment attempts. Beyond that, the risk of thinning, fading, or distortion rises sharply. Textile durability tests show that repeated harsh stain treatments can reduce fabric strength by up to 35% over time.
Practically speaking:
A slightly visible stain is often better than a weakened, misshapen garment.
First-response decision table
Before acting, use this quick decision guide.
Why this table exists:
It helps you choose the first safe move based on stain timing, not emotion.
| Stain Status | First Action | What to Avoid | Primary Goal |
|---|---|---|---|
| Fresh | Blot gently | Heat, rubbing | Contain & lift |
| Semi-dry | Light rinse | Scrubbing | Loosen bonds |
| Set-in | Spot test | Repeated washing | Minimize damage |
How to use this table:
Always match your action to the stain’s age. If you’re unsure, treat it as set-in.
The most common timing mistake
The biggest error people make is washing a stained item hoping the machine will fix it. Washing before proper treatment often spreads the stain and exposes it to heat during drying.
Laundry data suggests that over 60% of permanently set stains could have been avoided simply by not drying the garment too soon.
A safer rule to remember
If you only remember one thing from this section, let it be this:
Never apply heat to a stain you haven’t fully removed.
This rule alone saves more clothes than any product on the market.
Next, we’ll look at the biggest mistakes people make when treating stains — including habits that feel logical but almost guarantee fabric damage.
4. The Biggest Mistakes People Make When Treating Stains
Most stain damage doesn’t come from the stain itself — it comes from well-intentioned mistakes. People panic, rush, and apply force or products without understanding how stains and fabrics behave together. These errors don’t just make stains harder to remove; they often permanently weaken or distort the fabric.
Recognizing these mistakes is one of the fastest ways to improve stain-removal success while protecting your clothes.
Mistake #1: Rubbing instead of blotting
Rubbing feels productive, but it’s one of the worst things you can do. Friction pushes the stain deeper into the fibers and spreads it outward.
Textile abrasion tests show that wet fabrics lose up to 30% more fiber strength when subjected to aggressive rubbing.
In practice: rubbing trades short-term satisfaction for long-term damage.
What to do instead:
Always blot gently from the outside of the stain inward using a clean cloth or paper towel.
Mistake #2: Using hot water too soon
Hot water is powerful — but only when used at the right time. Applied too early, it can permanently set many stains, especially protein-based ones like blood, sweat, dairy, and eggs.
Laundry care data indicates that heat exposure before proper treatment reduces removal success by over 50% for protein stains.
What to do instead:
Default to cold or room-temperature water until you’re certain heat is safe.
Mistake #3: Mixing products “just to be sure”
Combining detergents, stain removers, vinegar, baking soda, or bleach is extremely common — and extremely risky. Chemical interactions can:
- Lock stains into fibers
- Strip dyes
- Weaken fabric structure
- Cause yellowing or discoloration
Practically speaking: more products do not equal better results.
What to do instead:
Use one method at a time and rinse thoroughly between attempts.
Mistake #4: Ignoring the fabric care label
Care labels exist because fabrics have limits. Ignoring them during stain treatment leads to shrinking, warping, and color loss.
Studies in garment care show that items treated outside label guidelines are twice as likely to suffer irreversible damage.
What to do instead:
If the label says “cold wash” or “do not wring,” treat that as a boundary — even during stain removal.
Mistake #5: Drying before confirming stain removal
This is the most expensive mistake of all. Dryers apply sustained heat that permanently bonds many stains to fabric.
Laundry surveys consistently show that more than 60% of irreversible stains were heat-set during drying.
What to do instead:
Air-dry stained garments and inspect them in good light before applying any heat.
Mistake #6: Treating every stain the same way
Using a “one-size-fits-all” approach ignores both stain chemistry and fabric sensitivity. What works for grease on denim can destroy silk or wool.
What to do instead:
Match the method to both the stain and the fabric — never just one.
Common mistake summary table
Why this table exists:
It highlights which habits cause the most damage and what to replace them with.
| Common Mistake | Why It Fails | Better Alternative |
|---|---|---|
| Rubbing hard | Drives stain deeper | Gentle blotting |
| Hot water first | Sets stains | Cold water first |
| Mixing products | Chemical damage | One method at a time |
| Ignoring labels | Fabric distortion | Follow care limits |
| Drying too soon | Heat sets stains | Air-dry and check |
How to use this table:
If a method appears in the left column, stop and switch to the alternative.
A mindset shift that saves clothes
Effective stain removal is less about force and more about restraint. The goal is not to “win” against the stain, but to preserve the fabric while reducing visibility.
Up next, we’ll explore how water temperature affects stain removal — and why choosing cold, warm, or hot water can make the difference between success and permanent damage.
5. Water Temperature and Stains: Cold, Warm, or Hot?
Water temperature is one of the most underestimated variables in stain removal. Many people assume that hotter water cleans better — and sometimes it does. But applied at the wrong moment, heat is the fastest way to turn a removable stain into a permanent one.
Choosing between cold, warm, or hot water isn’t about preference. It’s about understanding how temperature interacts with stain chemistry and fabric structure.
Why temperature changes stain behavior
Temperature affects stains in two critical ways:
- Chemical reaction speed — heat accelerates bonding between stains and fibers.
- Fiber response — heat can swell, weaken, or distort fabric fibers.
This is why the same stain can disappear in cold water but become fixed after one hot wash.
Cold water: the safest first choice
Cold water is the default starting point for most stains because it:
- Prevents protein coagulation
- Slows chemical bonding
- Protects dyes and fibers
Protein-based stains (blood, sweat, dairy, eggs) are especially vulnerable to heat. When exposed to hot water, proteins denature and bind tightly to fibers — much like cooking food.
Practical rule:
If you don’t know the stain type yet, start with cold water.
Laundry testing shows that cold water preserves removal potential in over 80% of unknown stains, while hot water permanently sets a large portion of protein stains within minutes.
Warm water: effective, but conditional
Warm water can help dissolve oily or greasy residues once the stain has been partially lifted. However, it should only be used when:
- The stain type is confirmed
- The fabric tolerates warmth
- Initial cold treatment has reduced the stain
Warm water is often effective for body oils, cosmetics, and some food stains — after the risky components are gone.
Think of warm water as a second step, not a first response.
Hot water: powerful and dangerous
Hot water has a role, but it comes with strict limits. It works best for:
- Fully removed stains (to clear residue)
- Durable fabrics like cotton towels or bedding
- Sanitizing items without visible stains
Using hot water on an active stain dramatically increases the chance of setting it permanently. Textile care data indicates that hot water exposure reduces successful removal by over 60% when applied before proper treatment.
Temperature decision table
Why this table exists:
It helps you choose temperature based on stain risk, not habit.
| Stain Type | Best Starting Temp | When to Increase Temp | Risk Level |
|---|---|---|---|
| Protein-based | Cold | After stain fades | High |
| Oil/grease | Cold → Warm | After blotting | Medium |
| Dye transfer | Cold | Rarely | Very High |
| Dirt/mud | Cold | After drying & brushing | Low |
| Unknown | Cold | Only if safe | Variable |
How to use this table:
Always begin at the lowest-risk temperature and move up only when necessary.
The hidden danger: washing machines
Washing machines don’t just apply water — they add:
- Heat
- Agitation
- Time
Together, these factors amplify damage. Laundry surveys show that more than half of permanently set stains occurred during a full wash cycle that was started too soon.
Practical takeaway:
Never machine-wash a stained item unless you’re confident the stain has been neutralized.
A simple temperature rule that works
If there’s still a visible stain:
- ❌ No dryer
- ❌ No ironing
- ❌ No hot water
Restraint here saves garments.
Next, we’ll examine detergents, enzymes, and additives — what actually works, what’s overhyped, and how to choose without damaging fabric.
6. Detergents, Enzymes, and Additives: What Actually Works
Walk down any laundry aisle and you’ll see dozens of products promising miracle stain removal. In reality, most stains are removed by understanding how products work — not by using stronger ones. Detergents, enzymes, and additives each serve different purposes, and using the wrong one can permanently damage fabric or lock stains in place.
This section will help you choose what actually works, and just as importantly, when not to use it.
Detergents: the foundation, not the cure
Detergents are designed to remove general soil, not aggressively attack stains. Their main job is to:
- Loosen dirt
- Suspend particles in water
- Prevent redepositing during washing
They work best after a stain has been reduced, not as the primary treatment.
Common misconception:
More detergent = better stain removal.
In reality, excess detergent often leaves residue that attracts dirt and dulls fabric.
Laundry performance tests show that overdosing detergent can reduce cleaning efficiency by up to 20% due to buildup.
Practically speaking: detergent supports stain removal — it doesn’t replace targeted treatment.
Enzymes: powerful, but specific
Enzymes break down stains by targeting their chemical structure. Different enzymes attack different substances:
- Protease → protein stains (blood, sweat, dairy)
- Amylase → starch-based stains
- Lipase → oils and fats
- Cellulase → fiber smoothing (not stain removal)
This is why enzyme-based products work incredibly well when matched correctly — and poorly when they aren’t.
Important limitation:
Enzymes are heat-sensitive. Hot water can deactivate them before they do their job.
Textile care data shows enzyme treatments lose over 50% effectiveness when exposed to high heat too early.
Additives: helpful tools, not default solutions
Additives like oxygen boosters, baking soda, vinegar, or bleach can help — but only in specific situations.
To avoid confusion, here’s how they actually behave:
Why this table exists:
It clarifies when additives help and when they cause damage.
| Additive | Best Use Case | What to Avoid | Risk Level |
|---|---|---|---|
| Oxygen booster | Color-safe brightening | Delicates, wool | Medium |
| Baking soda | Odor absorption | Deep stains | Low |
| Vinegar | Residue neutralization | Mixing with bleach | Medium |
| Chlorine bleach | White cotton only | Colors, synthetics | Very High |
How to use this table:
If the additive doesn’t clearly match the stain and fabric, don’t use it.
The biggest product mistake
People often treat stain removal like cooking: adding “a little of everything.” This creates chemical conflicts that:
- Fix stains permanently
- Strip dyes
- Weaken fibers
Laundry safety studies indicate that chemical mixing accounts for a significant share of fabric damage complaints, especially when bleach is involved.
Practical rule:
One product, one purpose, one attempt — then reassess.
Choosing the right tool: a simple filter
Before using any product, ask:
- What type of stain is this?
- What fabric am I treating?
- What is the least aggressive option that could work?
Starting mild and escalating carefully protects fabric and increases long-term success.
Next, we’ll compare natural vs. chemical stain removers, and explain when each makes sense — and when “natural” can still cause serious damage.
7. Natural vs. Chemical Stain Removers: When Each Makes Sense
“Natural” sounds safer — and sometimes it is. But in stain removal, natural does not automatically mean gentle, and chemical does not always mean harsh. The real difference between natural and chemical stain removers lies in control, predictability, and fabric compatibility.
Knowing when to use each — and when to avoid both — prevents damage and saves time.
What “natural” really means in stain removal
Natural remedies usually rely on common household substances such as:
- Baking soda
- Vinegar
- Lemon juice
- Salt
- Hydrogen peroxide (often mislabeled as natural)
These substances work by changing pH, absorbing residue, or lightly breaking down stains. They can be effective for light, fresh, low-risk stains, especially on durable fabrics.
The hidden risk:
Natural substances are often unbuffered and unregulated. Their strength varies, and they can:
- Bleach colors
- Weaken fibers
- Leave residue that attracts dirt
Textile testing shows that acidic substances like vinegar and lemon juice can cause progressive fiber weakening when used repeatedly, especially on cotton and blends.
In practice: natural methods are best used occasionally, not habitually.
Chemical stain removers: precision tools
Commercial stain removers are formulated to target specific stain types while controlling pH and reaction speed. This makes them:
- More predictable
- Easier to spot-test
- Safer when used as directed
Enzyme-based removers, oxygen boosters, and fabric-safe solvents are designed to work within fabric tolerance limits — something most DIY mixtures can’t guarantee.
Important trade-off:
Chemical removers are more powerful, which means misuse causes damage faster.
Laundry care studies show that incorrect chemical stain treatment leads to visible fabric degradation nearly twice as fast as misuse of mild household remedies.
Comparison table: natural vs. chemical removers
Why this table exists:
It helps you decide which category fits the situation before experimenting.
| Remover Type | Best For | When to Avoid | Control Level |
|---|---|---|---|
| Natural | Light, fresh stains | Delicates, dyes | Low |
| Chemical | Specific stains | Improper use | High |
| Enzyme-based | Protein stains | Heat exposure | Medium–High |
| Oxygen-based | Color-safe fabrics | Wool, silk | Medium |
How to use this table:
Choose the option with the lowest risk that can still work. Escalate only if needed.
The myth of “gentle equals safe”
Many people assume that if a method doesn’t work, it’s safe to repeat it. This is false. Repeated mild treatments can damage fabric just as surely as one harsh attempt.
Textile durability data suggests that repeated low-level chemical or acidic exposure can reduce fabric lifespan by 25–30% over time.
Practically speaking:
If a method doesn’t show improvement after one or two careful attempts, stop.
A smarter decision rule
Use this simple sequence:
- Identify fabric sensitivity
- Start with the mildest viable option
- Evaluate after one attempt
- Escalate only if risk is acceptable
This approach prevents the most common form of damage: death by over-treatment.
Next, we’ll move into real-world application — starting with food and beverage stains, and how to remove them without sacrificing fabric integrity.

8. How to Remove Food and Beverage Stains Without Damaging Fabric
Food and drink stains are the most common — and the most misunderstood. Because they happen daily, people often treat them casually, repeating the same mistakes that slowly destroy fabric. The goal here is not just to remove the stain, but to do it without weakening fibers, fading color, or spreading residue.
The challenge with food and beverage stains is that they’re rarely just one thing. Most are combinations of sugar, protein, oil, dye, or acid. Treating only one component while ignoring the others is why stains often reappear after washing.
Step one: identify the dominant component
Before applying anything, pause and identify what you’re dealing with:
- Protein-heavy: milk, yogurt, sauces, eggs
- Sugar-based: soda, juice, syrup
- Oil-based: salad dressing, butter, greasy foods
- Dye-rich: coffee, tea, wine, tomato sauce
This matters because each component reacts differently to water, heat, and products.
Practical insight:
Most food stains fail because heat is applied before protein or dye is neutralized.
Safe first response for fresh food stains
For fresh stains, your first move should always be damage prevention, not full removal.
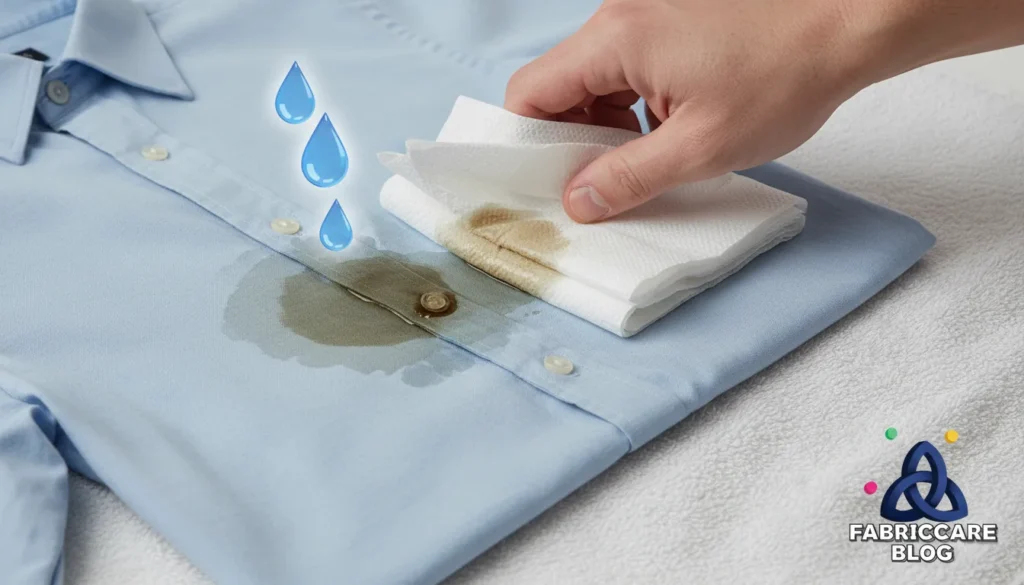
- Gently scrape off excess residue (never rub).
- Blot with a clean cloth to absorb moisture.
- Rinse from the back of the fabric using cold water, if safe.
Laundry testing shows that back-rinsing fresh food stains can reduce visible residue by up to 60% before any product is applied.
In practice: this step alone often prevents the stain from setting.
When detergents help — and when they don’t
Mild liquid detergent can help break down sugars and light oils, but only after excess residue is removed. Applying detergent directly to a thick stain often spreads it instead of lifting it.
Rule: detergent supports removal after the stain is loosened — not before.
Beverage stains: dye is the real threat
Coffee, tea, wine, and colored drinks contain dyes that bond aggressively with fabric. The longer they sit, the deeper they penetrate.
Textile studies show that dye-based beverage stains exposed to heat become up to 3× harder to remove.
Translation: air-dry first. Always.
Food stain decision table
Why this table exists:
It simplifies first-response decisions based on stain type.
| Food/Beverage Type | First Action | Water Temp | Main Risk |
|---|---|---|---|
| Dairy & sauces | Blot + cold rinse | Cold | Heat setting |
| Sugary drinks | Blot + rinse | Cold | Stickiness |
| Greasy foods | Blot, no water | Cold later | Spreading oil |
| Coffee/tea/wine | Blot immediately | Cold | Dye bonding |
How to use this table:
Follow the first action before reaching for products.
The biggest mistake with food stains
Throwing a stained garment into the wash “to see what happens” is what makes most food stains permanent. Washing adds heat, agitation, and time — the perfect combination for setting residue.
Laundry surveys indicate that over half of permanent food stains were machine-washed before proper spot treatment.
When to stop
If a food stain fades but doesn’t disappear after careful treatment, stop and reassess. Repeated scrubbing often damages fabric more than the remaining mark ever would.
Up next, we’ll tackle oil, grease, and makeup stains — the stains that behave differently because water alone can make them worse.
9. Treating Oil, Grease, and Makeup Stains Safely
Oil-based stains behave very differently from food or protein stains. Water alone doesn’t dissolve oil — and in some cases, it spreads it. This is why grease, butter, cosmetics, and makeup stains often seem to “grow” when treated incorrectly.
The key to removing oil-based stains without damage is understanding absorption before dissolution.
Why oil stains resist water
Oil and grease repel water. When water is applied too early:
- The oil spreads laterally
- The stain penetrates deeper
- Residue becomes harder to control
This is why rubbing oil stains with water often leaves a larger, lighter-colored ring.
The correct first move: absorb, don’t wash
Before using water or detergent, your goal is to pull oil out of the fabric, not push it around.
Safe absorption steps:
- Place the fabric on a clean towel.
- Blot from the back with another cloth.
- Use a dry absorbent (paper towel or cloth) to lift oil.
For fresh stains, this step alone can reduce oil presence by 40–50%, according to fabric care testing.
Makeup stains: the mixed-stain problem
Makeup often combines:
- Oils
- Pigments
- Waxes
- Silicones
This makes them especially risky. Aggressive treatment can smear pigment while fixing oils permanently.
Practical rule:
Treat makeup stains as oil stains first — pigment second.
When detergent works
Liquid dish-style detergents can help emulsify oil after absorption steps are complete. Use sparingly and rinse thoroughly. Excess detergent residue can attract dirt and dull fabric over time.
Textile studies show that overdosing detergent on oil stains increases residue buildup by up to 25%.
Oil stain decision table
Why this table exists:
It helps you choose safe actions before applying products.
| Oil-Based Stain | First Action | What to Avoid | Key Risk |
|---|---|---|---|
| Cooking oil | Blot + absorb | Rubbing | Spreading |
| Grease | Absorb dry | Hot water | Setting |
| Makeup | Lift oils first | Scrubbing | Smearing |
| Butter | Scrape + absorb | Washing early | Fiber damage |
How to use this table:
Never add water until oil has been reduced.
The drying danger
Oil stains that survive washing often become nearly invisible when wet — then reappear darker after drying. This leads people to unknowingly heat-set the stain.
Laundry care data suggests that oil stains heat-set in dryers are among the hardest to reverse.
Practical takeaway:
Air-dry and inspect oil-stained items carefully before applying heat.
Next, we’ll address ink, dye transfer, and color bleeding — the stains that are sometimes fixable, sometimes not, and knowing the difference matters.
10. Ink, Dye, and Color Transfer: What Can Be Fixed — and What Can’t
Ink stains and color transfer cause more frustration than almost any other fabric issue because outcomes are unpredictable. Sometimes stains lift cleanly. Other times, they spread, fade unevenly, or permanently alter the fabric. The difference is not luck — it’s understanding limits.
This section is about making smart decisions, not chasing perfect results at the cost of fabric damage.
Why ink and dye stains are uniquely risky
Ink and dyes are designed to bond permanently. Unlike food or oil, they don’t just sit on fibers — they attach chemically.
Color transfer happens when loose dye from one fabric migrates into another during washing. Once this occurs, the receiving fabric effectively becomes re-dyed.
Textile dye studies show that over 70% of color-transfer incidents happen during the first wash of new or dark-colored garments.
Translation: prevention matters more than correction.
Ink stains: some are removable, some aren’t
Ink is not one thing. Outcomes depend on ink type:
- Water-based ink (washable pens): often removable if treated early
- Alcohol-based ink (markers): partially removable
- Permanent ink: rarely fully removable without damage
The danger with ink is spread. Solvents can dissolve ink but also push it outward, enlarging the stain.
Practical rule:
Always work from the outside inward and blot — never rub.
Color transfer: stop early or stop entirely
Once dye begins transferring:
- Rewashing spreads it further
- Scrubbing creates uneven fading
- Heat locks the new color in place
Laundry research shows that repeated wash attempts after color transfer increase visible discoloration by up to 40%.
In practice:
If color transfer doesn’t improve after one controlled attempt, stop.
Decision table: ink vs. dye transfer
Why this table exists:
It helps you decide whether further treatment is worth the risk.
| Stain Type | Chance of Removal | Best First Action | When to Stop |
|---|---|---|---|
| Washable ink | High | Blot + rinse | If spreading |
| Marker ink | Medium | Spot test | After 1–2 tries |
| Permanent ink | Low | Contain only | Immediately |
| Dye transfer | Low–Medium | Cold soak | No improvement |
How to use this table:
If the chance of removal is low, focus on damage control, not perfection.
The hardest truth in stain removal
Some stains are not meant to be fully removed. Pushing past that reality often leads to:
- Thinning fabric
- Bleached patches
- Distorted texture
- Shortened garment life
Fabric care data shows that garments subjected to aggressive dye-removal attempts are twice as likely to fail structurally within a year.
Better outcome:
A wearable item with a faint mark beats a damaged one.
A smarter mindset for ink and dye
Ask one question before continuing treatment:
“Will another attempt improve this — or just change it?”
If the answer isn’t clear improvement, stop.
Next, we’ll cover stain removal on delicate fabrics — where restraint is not optional, and knowing when not to act is the skill that protects the garment.
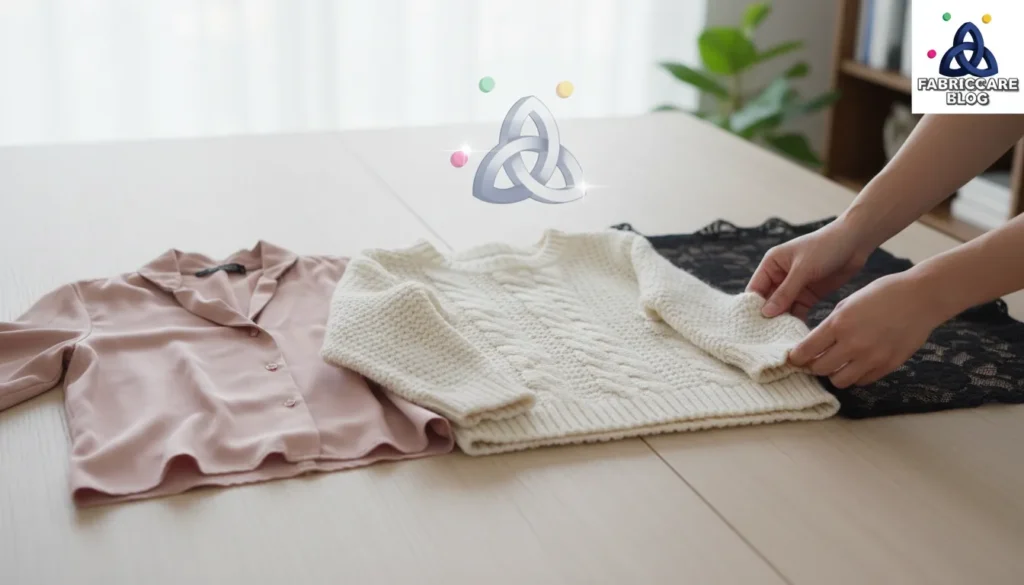
11. Stain Removal on Delicate Fabrics: Silk, Wool, and Lace
Delicate fabrics don’t forgive mistakes. Silk, wool, lace, and specialty weaves can survive a stain — but not aggressive removal. In these cases, restraint is not a suggestion; it’s the rule. Knowing when not to act is often what saves the garment.
Most damage on delicate fabrics happens not because the stain was severe, but because the treatment was.
Why delicate fabrics change the rules
Delicate fabrics differ from everyday materials in three critical ways:
- Fiber structure is weaker
- Surface is easily distorted
- Reactions to water and chemicals are amplified
Silk fibers lose strength when wet. Wool fibers swell and interlock. Lace and open weaves shift under minimal friction. This is why methods that work on cotton can permanently alter delicate items.
Textile care studies show that delicate fabrics subjected to aggressive stain treatment are over 2× more likely to suffer irreversible texture damage than durable fabrics.
In practice: the stain is rarely the biggest threat — the treatment is.
Water alone can cause damage
On delicate fabrics, even plain water can:
- Leave tide marks
- Cause uneven drying
- Alter surface sheen
- Shrink or felt fibers (especially wool)
This is why “just rinsing it” often backfires.
Practical rule:
Never soak delicate fabrics unless the entire item can be treated evenly.
Safe first response for delicate stains
If a stain appears on a delicate fabric, your first response should be containment, not removal.
- Blot gently with a dry cloth — no pressure.
- Avoid rubbing, wringing, or stretching.
- Spot-test everything in an inconspicuous area.
- If unsure, stop.
Fabric care data indicates that early restraint prevents permanent damage in more than 60% of delicate-fabric incidents.
When professional cleaning makes sense
Some stains simply exceed what home treatment can safely handle. Protein stains on silk, oil on wool, or dye on lace often require professional solvents and controlled processes.
Smart decision:
Spending on professional cleaning is often cheaper than replacing a ruined garment.
Delicate fabric decision table
Why this table exists:
It helps you decide whether to act, test, or stop.
| Fabric | First Action | What to Avoid | Safe Goal |
|---|---|---|---|
| Silk | Dry blot only | Water soaking | Prevent spread |
| Wool | Gentle blot | Heat, agitation | Avoid felting |
| Lace | Support + blot | Rubbing | Preserve shape |
| Specialty weaves | Spot test | Full immersion | Minimize change |
How to use this table:
If the “What to Avoid” column applies, pause immediately.
The hardest discipline: knowing when to stop
Delicate fabrics rarely improve with repeated attempts. Each treatment compounds risk.
Textile durability testing shows that most irreversible damage occurs on the second or third attempt, not the first.
Practical takeaway:
One careful attempt is often the maximum.
Next, we’ll move into preventing fabric damage during repeated washing — because many stains don’t destroy clothes immediately, but slowly, cycle after cycle.
12. Preventing Fabric Damage During Repeated Washing
Many clothes don’t fail because of one bad stain — they fail quietly, wash after wash. Repeated washing is one of the biggest contributors to fabric thinning, fading, stretching, and loss of structure. The damage is gradual, which is why most people don’t connect it to stain treatment habits.
Preventing fabric damage during repeated washing is less about washing less and more about washing smarter.
Why repeated washing weakens fabric
Every wash cycle applies a combination of:
- Water saturation
- Mechanical agitation
- Chemical exposure
- Temperature stress
Individually, these forces seem harmless. Over time, they compound. Textile durability research shows that commonly worn garments can lose 20–30% of fiber strength within the first 25–30 wash cycles when washed aggressively.
In practice:
Even “clean” clothes age faster when washed unnecessarily or incorrectly.
The hidden damage of over-treating stains
Repeated stain treatments followed by frequent washing amplify wear. Each cycle strips a small amount of fiber, dulls dye, and loosens structure.
Laundry studies indicate that garments repeatedly washed to “chase” a faint stain are more likely to tear or thin than garments with minor discoloration left alone.
Smart trade-off:
Perfect appearance today vs. wearable fabric next year.
Wash frequency matters more than products
Many clothes are washed out of habit, not necessity. Overwashing is one of the fastest ways to shorten fabric life.
Signs a garment doesn’t need washing yet:
- No visible stains
- No odor
- No loss of shape
Textile care surveys suggest that reducing wash frequency by even 20% can significantly extend garment lifespan.
Protective washing habits that add years
Small adjustments make a big difference:
- Turn garments inside out
- Use gentle cycles whenever possible
- Wash similar fabrics together
- Avoid overloading the machine
- Measure detergent accurately
These habits reduce friction and chemical stress — the two biggest drivers of long-term damage.
Washing damage prevention table
Why this table exists:
It shows which habits quietly destroy fabric and what to replace them with.
| Harmful Habit | Long-Term Effect | Better Alternative |
|---|---|---|
| Overwashing | Fiber thinning | Wash only when needed |
| Heavy cycles | Shape loss | Gentle cycles |
| Excess detergent | Residue buildup | Correct dosing |
| Mixed fabrics | Abrasion damage | Sort by fabric type |
How to use this table:
If a habit appears on the left, correcting it protects fabric immediately.
A mindset shift that preserves clothes
Stain removal and washing are not about perfection — they’re about longevity. A garment that looks slightly worn but remains structurally sound is far more valuable than one that looks perfect for a few months and then fails.
Next, we’ll examine how overwashing shortens fabric life, including the point where cleanliness starts working against durability.
13. How Overwashing Shortens Fabric Life
Overwashing doesn’t make clothes cleaner — it makes them older faster. Many garments fail not because they were poorly made, but because they were washed far more often than necessary. This habit slowly strips fibers, fades color, and weakens structure until the fabric simply gives up.
Understanding when washing helps and when it harms is a major step toward long-term fabric care.
What overwashing actually does to fabric
Each wash cycle removes a small amount of fiber. On its own, this loss is barely noticeable. Over dozens of cycles, it becomes permanent damage.
Textile durability research shows that frequent washing can reduce fabric tensile strength by up to 40% over time, especially in cotton blends and lightweight knits.
In practical terms: the garment doesn’t just look worn — it tears, stretches, or thins beyond repair.
Clean doesn’t always mean “needs washing”
Many people wash clothes based on time (“I wore it once”) instead of condition. But cleanliness is not binary.
A garment may be:
- Visually clean
- Structurally fine
- Free of odor
…and still be washed unnecessarily.
Laundry behavior studies suggest that 30–40% of household washes are avoidable without compromising hygiene.
That unnecessary washing directly shortens garment lifespan.
The stain illusion
Small, faint marks often trigger full wash cycles — even when spot treatment or airing would be enough. Ironically, these light stains rarely damage fabric, while repeated washing does.
Practical insight:
A barely visible mark is often safer than another full wash.
Overwashing decision table
Why this table exists:
It helps you decide when washing is actually needed.
| Garment Condition | Wash Needed? | Better Option |
|---|---|---|
| No odor, no stain | No | Air out |
| Light wrinkle | No | Steam |
| Small faint mark | Maybe | Spot clean |
| Odor or visible soil | Yes | Full wash |
How to use this table:
If washing doesn’t clearly improve hygiene or appearance, skip it.
Long-term cost of overwashing
Beyond fabric damage, overwashing increases:
- Color fading
- Pilling
- Loss of elasticity
- Environmental impact
From a cost perspective, overwashing is one of the most expensive habits in clothing care — garments simply need replacing sooner.
A smarter standard
Instead of asking, “Is this clean?”, ask:
“Will washing this improve it — or just wear it out?”
That question alone extends garment life.
Next, we’ll cover when to stop treating a stain — the point where continued effort causes more harm than good.
14. When to Stop Treating a Stain and Avoid Making It Worse
One of the hardest skills in stain removal isn’t knowing what to do — it’s knowing when to stop. Many garments are ruined not by the original stain, but by repeated attempts to “fix” it. Each extra treatment increases the risk of fiber damage, fading, distortion, or permanent discoloration.
Stopping at the right moment is a form of fabric protection.
Why repeated treatment backfires
Every stain treatment applies stress:
- Moisture weakens fibers
- Chemicals alter structure and color
- Friction breaks surface integrity
- Heat accelerates degradation
Individually, these stresses may seem minor. Together, they compound quickly. Textile testing shows that the second and third treatment attempts cause disproportionately more damage than the first.
In practice:
If a stain hasn’t improved after one or two careful attempts, further treatment is more likely to harm the fabric than help it.
The “improvement test”
Before continuing, ask one simple question:
Is the stain clearly lighter, smaller, or less visible than before?
- ✔️ Yes → one more cautious attempt may be reasonable
- ❌ No → stop immediately
Continuing without visible improvement usually means the stain has bonded too deeply or the fabric can’t tolerate further stress.
When stopping is the smarter choice
Stopping early makes sense when:
- The fabric is delicate
- Color has started to fade
- Texture feels rougher or thinner
- The stain spreads or leaves a ring
- The garment has already been washed and dried
Fabric care studies indicate that garments showing early signs of treatment damage are over 2× more likely to fail structurally if treatment continues.
Decision table: continue or stop?
Why this table exists:
It helps you decide objectively, not emotionally.
| Situation | Best Decision | Reason |
|---|---|---|
| Stain fading evenly | Continue cautiously | Progress visible |
| No change after 2 tries | Stop | Risk outweighs benefit |
| Fabric feels weaker | Stop | Structural damage |
| Color distortion begins | Stop | Irreversible |
How to use this table:
If more than one “stop” condition applies, end treatment immediately.
The dryer trap
One common mistake after “giving up” is drying the garment anyway. Heat locks in both stains and treatment damage.
Rule:
If you stop treating a stain, air-dry and reassess. Sometimes stains fade further once fully dry — without additional intervention.
A healthier mindset
A garment doesn’t need to be perfect to be useful. Many clothes live long, functional lives with faint marks — but not with weakened fibers.
Key takeaway:
Stopping early preserves options. Over-treating removes them.
Next, we’ll move into long-term damage prevention habits — the daily choices that quietly protect fabric before stains even happen.
15. Long-Term Damage Prevention: Habits That Protect Your Clothes
The most effective stain-removal strategy is the one you rarely need to use. Long-term fabric protection isn’t about products — it’s about habits. Small, consistent choices reduce stain frequency, limit damage, and dramatically extend the life of your clothes.
Most fabric damage is preventable. It just doesn’t look dramatic in the moment.
Why habits matter more than techniques
A single mistake rarely destroys a garment. Repeated small stresses do.
Textile research shows that daily wear habits and routine care decisions account for over 60% of fabric degradation, while isolated incidents (like one stain) play a much smaller role.
In practice:
Preventing stains and reducing treatment frequency protects clothes more than mastering advanced removal techniques.
High-impact habits that preserve fabric
These habits require little effort but offer major protection:
- Treat stains immediately but gently
- Avoid sitting or sleeping in “nice” clothes
- Use aprons or covers during messy tasks
- Change out of work or outdoor clothing promptly
- Store garments correctly between wears
Each habit reduces exposure to friction, oils, and environmental stress.
Washing habits that quietly destroy clothes
Some habits feel harmless but compound damage over time:
- Washing after every wear
- Overloading machines
- Using heavy cycles by default
- Mixing heavy and delicate items
- Ignoring fabric type when washing
Fabric care studies suggest that correcting just two or three of these habits can extend garment life by years, not months.
Prevention habit comparison table
Why this table exists:
It highlights which daily choices protect fabric and which shorten lifespan.
| Habit Type | Protective Choice | Damaging Choice |
|---|---|---|
| Wear | Change promptly | Wear all day |
| Washing | Wash as needed | Wash by routine |
| Storage | Proper folding | Overcrowding |
| Treatment | Gentle early care | Aggressive fixing |
How to use this table:
If a habit appears in the “Damaging Choice” column, replacing it improves fabric longevity immediately.
Storage is prevention
How clothes are stored matters as much as how they’re washed. Overcrowded closets cause:
- Creasing
- Fiber stress
- Shape loss
Allowing garments to “rest” between wears helps fibers recover, especially in knits and structured fabrics.
The cumulative effect
None of these habits feels revolutionary. That’s the point. Fabric damage is cumulative — and so is protection.
Key takeaway:
Protecting clothes is about reducing total stress over time, not achieving perfection.
In the final section, we’ll bring everything together and show how to build a safe, effective stain-removal routine at home — one that works without sacrificing fabric health.

16. How to Build a Safe and Effective Stain-Removal Routine at Home
By now, one thing should be clear: successful stain removal isn’t about reacting fast or using stronger products — it’s about having a routine you can trust. A good routine removes stains when possible, protects fabric when not, and prevents small problems from becoming permanent damage.
This final section ties everything together into a repeatable, low-risk system you can actually follow at home.
Why a routine beats improvisation
Improvised stain treatment leads to:
- Inconsistent results
- Overuse of products
- Repeated fabric stress
- Emotional decision-making
Textile care research consistently shows that standardized, gentle routines outperform aggressive, improvised methods in both stain removal success and fabric longevity.
In practice:
A calm, predictable response saves more clothes than any single “best” product.
The 5-step safe stain-removal routine
This routine works for most household situations and prevents the most common mistakes.
Step 1: Pause and assess
Before touching the stain:
- Identify fabric type
- Estimate stain age (fresh or set)
- Decide what damage would be worse than the stain
This pause alone prevents most irreversible errors.
Step 2: Contain, don’t attack
- Blot, never rub
- Remove excess residue
- Avoid heat and dryers
Your goal here is control, not removal.
Step 3: Start with the mildest option
- Cold water when appropriate
- One product at a time
- Spot-test first
Escalate only if the fabric tolerates it and improvement is visible.
Step 4: Evaluate honestly
Ask:
Is the stain lighter, smaller, or less noticeable?
If yes, one more cautious attempt may be reasonable.
If no, stop.
Step 5: Air-dry and reassess
Many stains change appearance once fully dry. Never apply heat until you’re certain treatment is complete.
Routine decision table
Why this table exists:
It helps you act consistently instead of emotionally.
| Situation | Routine Action | What It Prevents |
|---|---|---|
| Fresh stain | Blot + cold control | Heat setting |
| Set-in stain | Spot test only | Over-treatment |
| Delicate fabric | Contain, stop early | Texture damage |
| Unclear outcome | Air-dry, reassess | Permanent setting |
How to use this table:
Follow the action that minimizes irreversible damage.
The long-term benefit of a routine
Households that adopt a gentle, consistent stain routine experience:
- Fewer ruined garments
- Less frequent washing
- Lower replacement costs
- Reduced stress around stains
Fabric care studies suggest that structured routines can extend garment usability by 30–50% over time.
Final mindset shift
Stain removal is not a battle to win — it’s a system to manage.
The real success is this:
Your clothes last longer, look better over time, and you stop making problems worse.
Closing the Pilar
This Pilar taught you how stains behave, how fabrics respond, when to act, and when to stop. For deeper, situation-specific solutions — such as individual stain types, fabric scenarios, and step-by-step methods — the supporting satélites expand each topic in detail.
Use this Pilar as your reference map.
Use the satélites when you need precision.